Snapper S150X User Manual Page 3
- Page / 19
- Table of contents
- BOOKMARKS
- Dealer Setup 1
- & Adjustment Instructions 1
- Quick Setup List 2
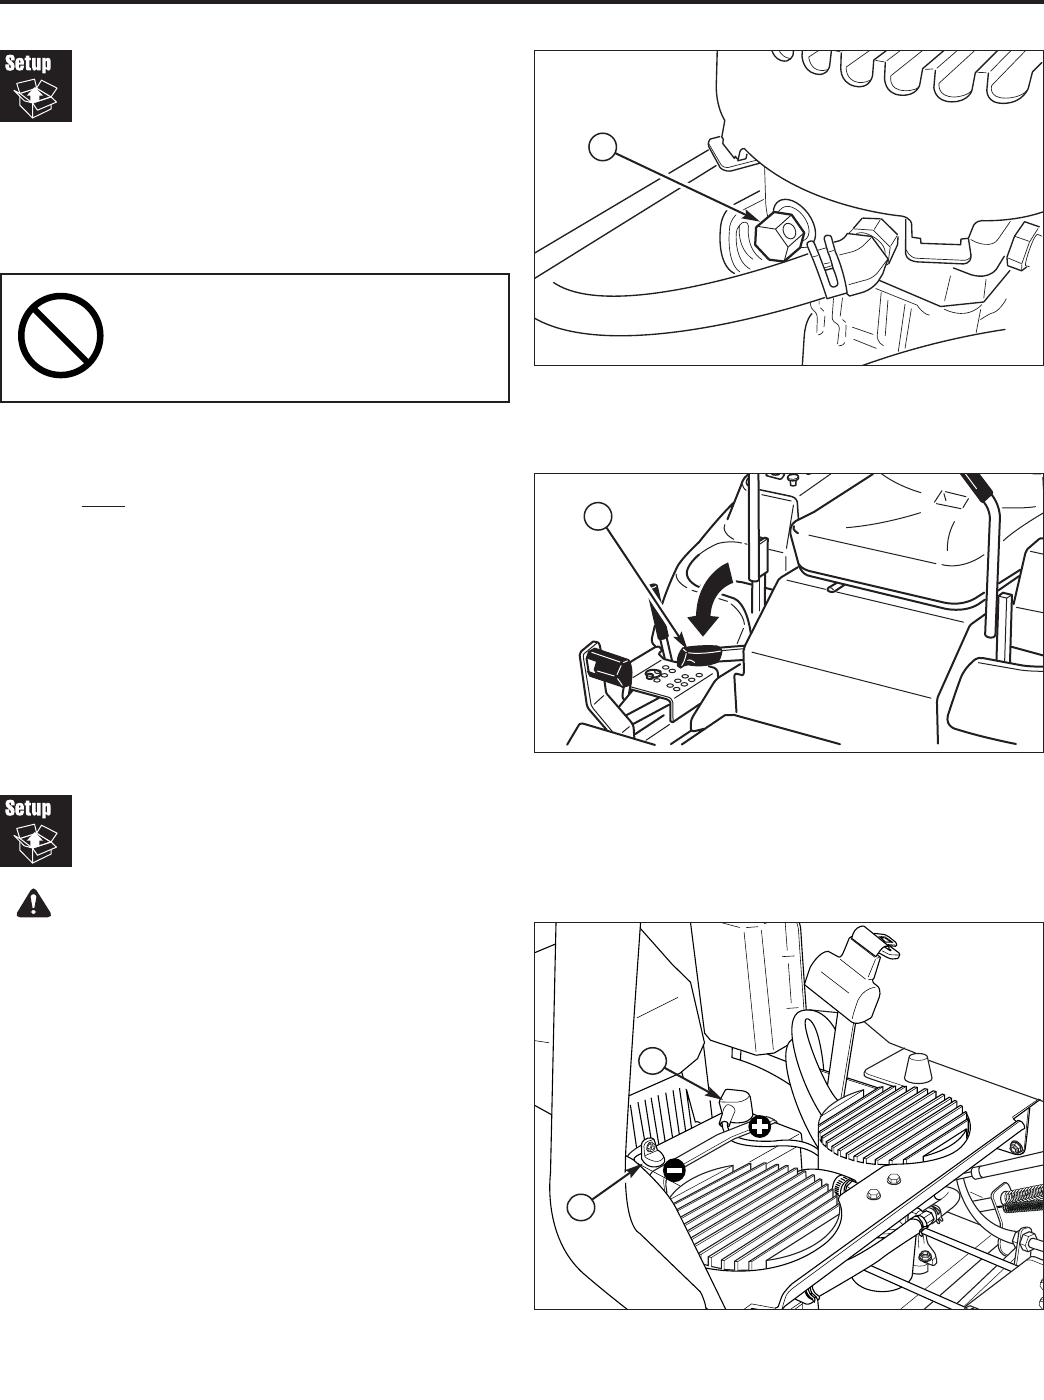
- Uncrating 3
- Battery Installation 3
- Assembly 4
- Roll Bar Assembly 5
- Fluid Levels 7
- Check Tire Pressures 7
- Check the Mower 8
- Check Deck Rod Timing 9
- Deck Leveling 10
- Adjustment 10
- Check Deck Drive Belt 11
- Lubrication 12
- Adding Fuel 13
- Starting The Engine 13
- Safety Checks 14
- Perform the 14
- Procedures 15
- Motion Control Handle 16
- Return-To-Neutral & 17
- Neutral Adjustment 17
- Parking Brake 18
- TP 300-7343-A-M1-SP 19
Related products and manuals for Lawnmowers Snapper S150X
 (54 pages)
(28 pages)
(56 pages)
(20 pages)
(54 pages)
(28 pages)
(56 pages)
(20 pages)
© 2020, manymanuals.com. All rights reserved. | 2.502 s |
 Manymanuals.com
 Manymanuals.de
 Manymanuals.fr
 Manymanuals.it
 Manymanuals.pl
 Manymanuals.cz
 Manymanuals.es
 Manymanuals-pt.com
Comments to this Manuals